CREATE YOUR MAP !
Learn how to create your own map! If you want to go the easy route, you can instead PICK A PREBUILT MAP.
Tools you will need
In order to build your own map for WorkAdventure, you need:
- the Tiled editor software
- "tiles" (i.e. images) to create your map (this starter kit provides a good default tileset for offices)
- a web-server to serve your map (this starter kit proposes to use Github static pages as a web-server which is both free and performant)
WorkAdventure comes with a "map starter kit" that we recommend using to start designing your map quickly.
Getting started
Start by creating a GitHub account if you don't already have one.
Then, go to the Github map starter kit repository page and click the "Use this template" button.

You will be prompted to enter a repository name for your map.
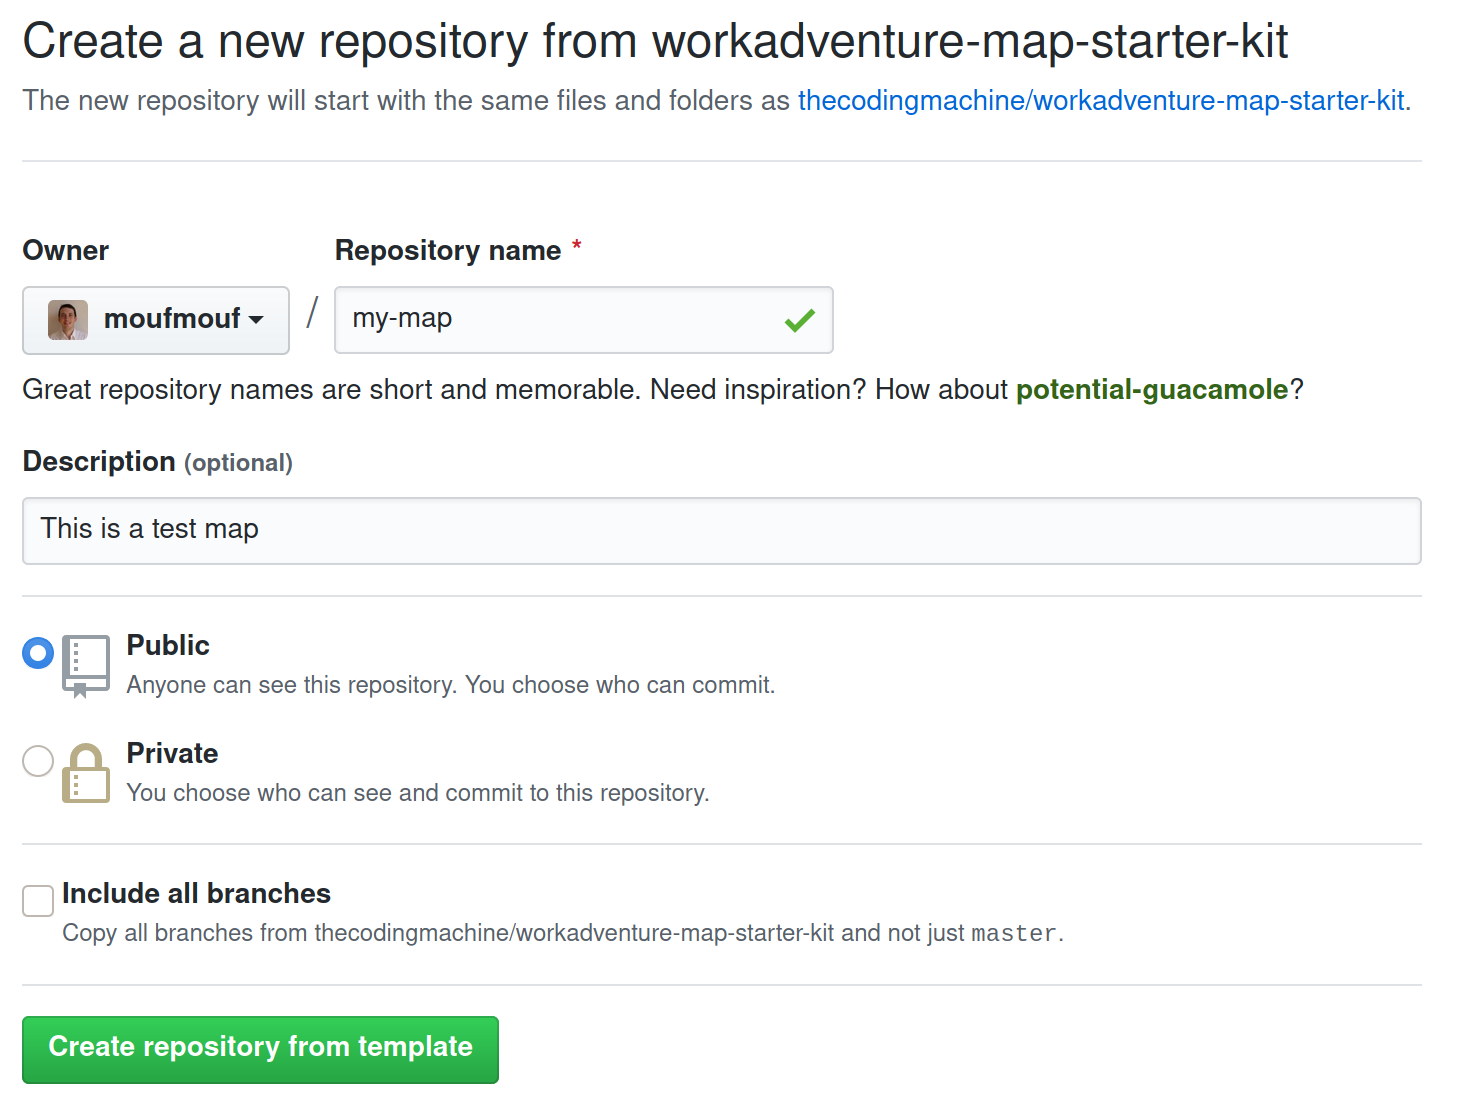
Be sure to keep the repository "Public".
In your newly created repository, click on the Settings tab and scroll down to the GitHub Pages section. Then select the gh-pages branch. It might already be selected, but please be sure to click on it nonetheless (otherwise GitHub will not enable GitHub pages).
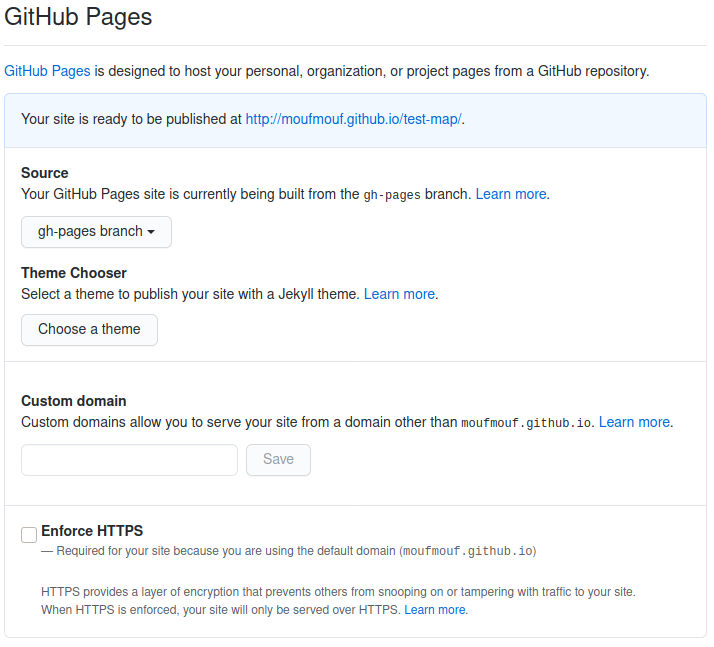
Wait a few minutes... Github will deploy a new website with the content of the repository. The address of the website is visible in the "GitHub Pages" section.
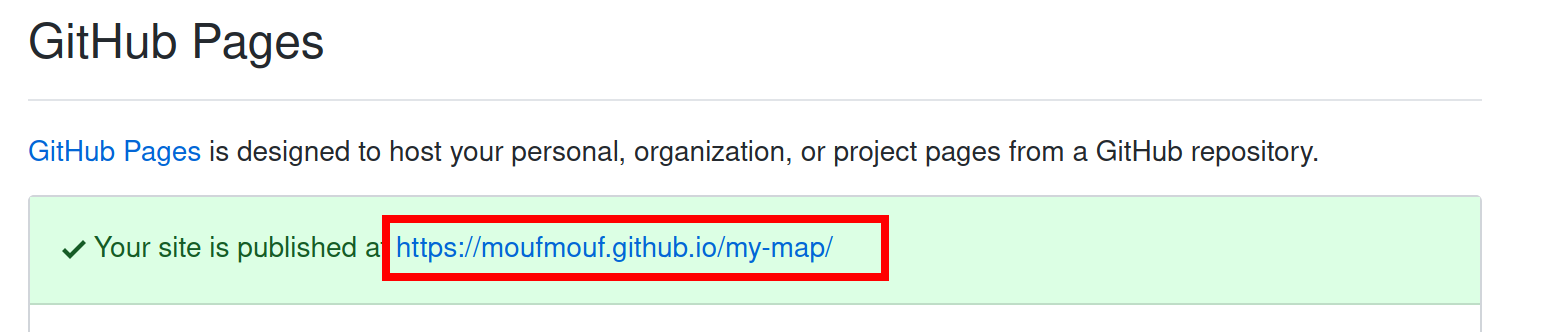
Click on the link. You should be redirected directly to WorkAdventure, on your map!
Customizing your map
Your map is now up and online, but this is still the demo map from the starter kit. You need to customize it.
Cloning the map
Start by cloning the map. If you are used to Git and GitHub, simply clone the map to your computer using your preferred tool and jump to the next chapter.
If you are new to Git, cloning the map means downloading the map to your computer. To do this, you will need Git, or a Git compatible tool. Our advice is to use GitHub Desktop. We recommend you take some time mastering the notion of pull / commit / push as this will make uploading your maps really easier.
As an (easier) alternative, you can simply use the "Export" button to download the code of the map in a big Zip file. When you want to upload your work again, you will simply drag'n'drop your files in the GitHub website.
Loading the map in Tiled
The sample map is in the file map.json.
You can load this file in Tiled.
Now, it's up to you to edit the map and write your own map.
Some resources regarding Tiled:
About WorkAdventure maps
In order to design a map that will be readable by WorkAdventure, you will have to respect some constraints.
In particular, you will need to:
- set a start position for the players
- configure the "floor layer" (so that WorkAdventure can correctly display characters above the floor, but under the ceiling)
- eventually, you can place exits that link to other maps
- the "Tile Layer Format" must be set to CSV. If you started from the map starter kit as explained above, you have nothing to do. However, if you start from scratch, please be sure to select "CSV" for the tile layer format when creating the map. You can change this setting later in the map properties.
WorkAdventure Map Rules
A few things to notice:
- your map can have as many layers as you want
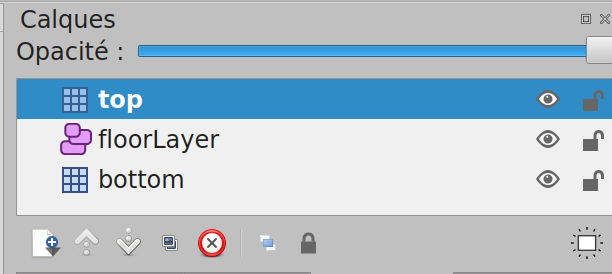
- your map MUST contain a layer named "floorLayer" of type "objectgroup" that represents the layer on which characters will be drawn. Every layer above the "floorLayer" will be displayed on top of the characters.
- the tilesets in your map MUST be embedded. You cannot refer to an external typeset in a TSX file. Click the "embed tileset" button in the tileset tab to embed tileset data.
- your map MUST be exported in JSON format. You need to use a recent version of Tiled to get JSON format export (1.3+)
- WorkAdventure doesn't support object layers and will ignore them
- If you are starting from a blank map, your map MUST be orthogonal and tiles size should be 32x32.
Building walls and "collidable" areas
By default, the characters can traverse any tiles. If you want to prevent your characeter from
going through a tile (like a wall or a desktop), you must make this tile "collidable". You can do
this by settings the collides property on a given tile.
To make a tile "collidable", you should:
- select the relevant tileset and switch to "edit" mode:
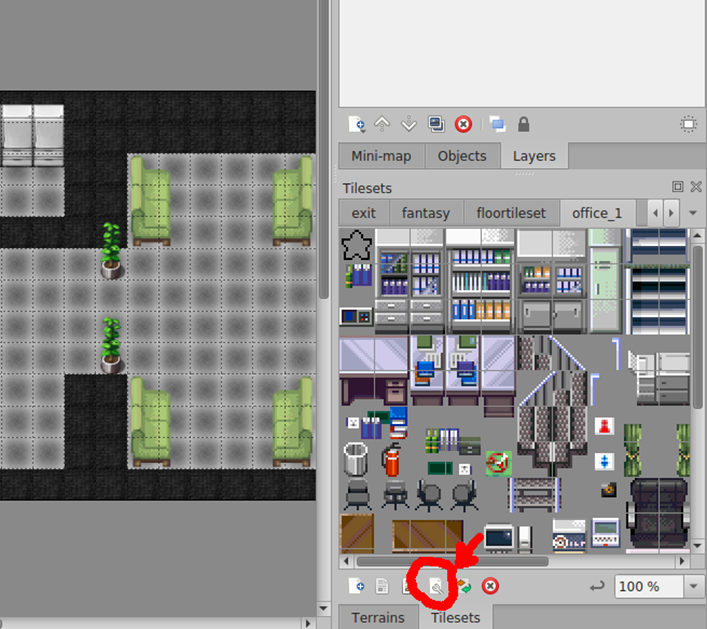
- right click on a tile of the tileset to select it:
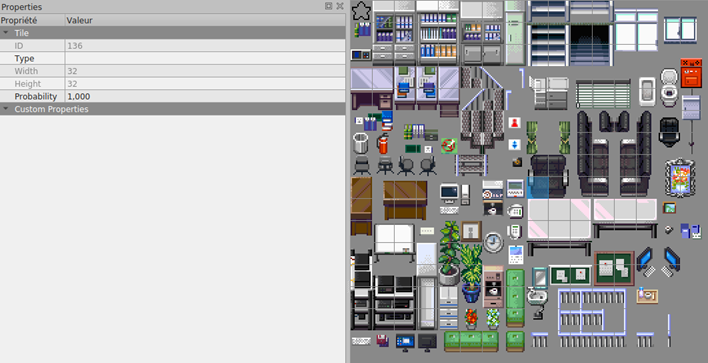
- on the left pane in the custom properties section, right click and select "Add properties":
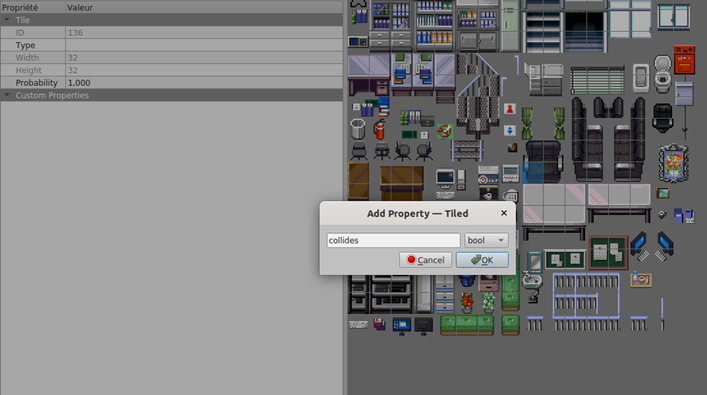
Please add acollidesproperty. The type of the property must be bool. - finally, check the checkbox for the
collidesproperty:

Repeat for every tile that should be "collidable".
Defining a default entry point
In order to define a default start position, you MUST create a layer named "start" on your map. This layer MUST contain at least one tile. The players will start on the tile of this layer. If the layer contains many tiles selected, the players will start randomly on one of those tiles.
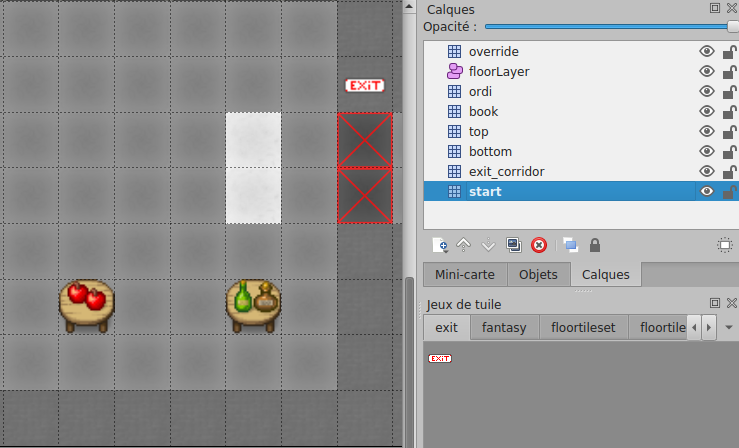
In the screenshot above, the start layer is made of the 2 white tiles. These tiles are not visible to the end user because they are hidden below the "bottom" layer that displays the floor of the map.
Defining exits
In order to place an exit on your scene that leads to another scene:
- You must create a specific layer. When a character reaches ANY tile of that layer, it will exit the scene.
- In layer properties, you MUST add "exitUrl" property. It represents the URL of the next scene. You can put relative or absolute URLs.
- If you want to have multiple exits, you can create many layers with name "exit". Each layer has a different key
exitUrland have tiles that represent exits to another scene.
Understanding map URLs in WorkAdventure:
There are 2 kinds of URLs in WorkAdventure:
- Public URLs are in the form https://play.workadventu.re/_/[instance]/[server]/[path to map]
- Private URLs (used in paid accounts) are in the form https://play.workadventu.re/@/[organization]/[world]/[map]
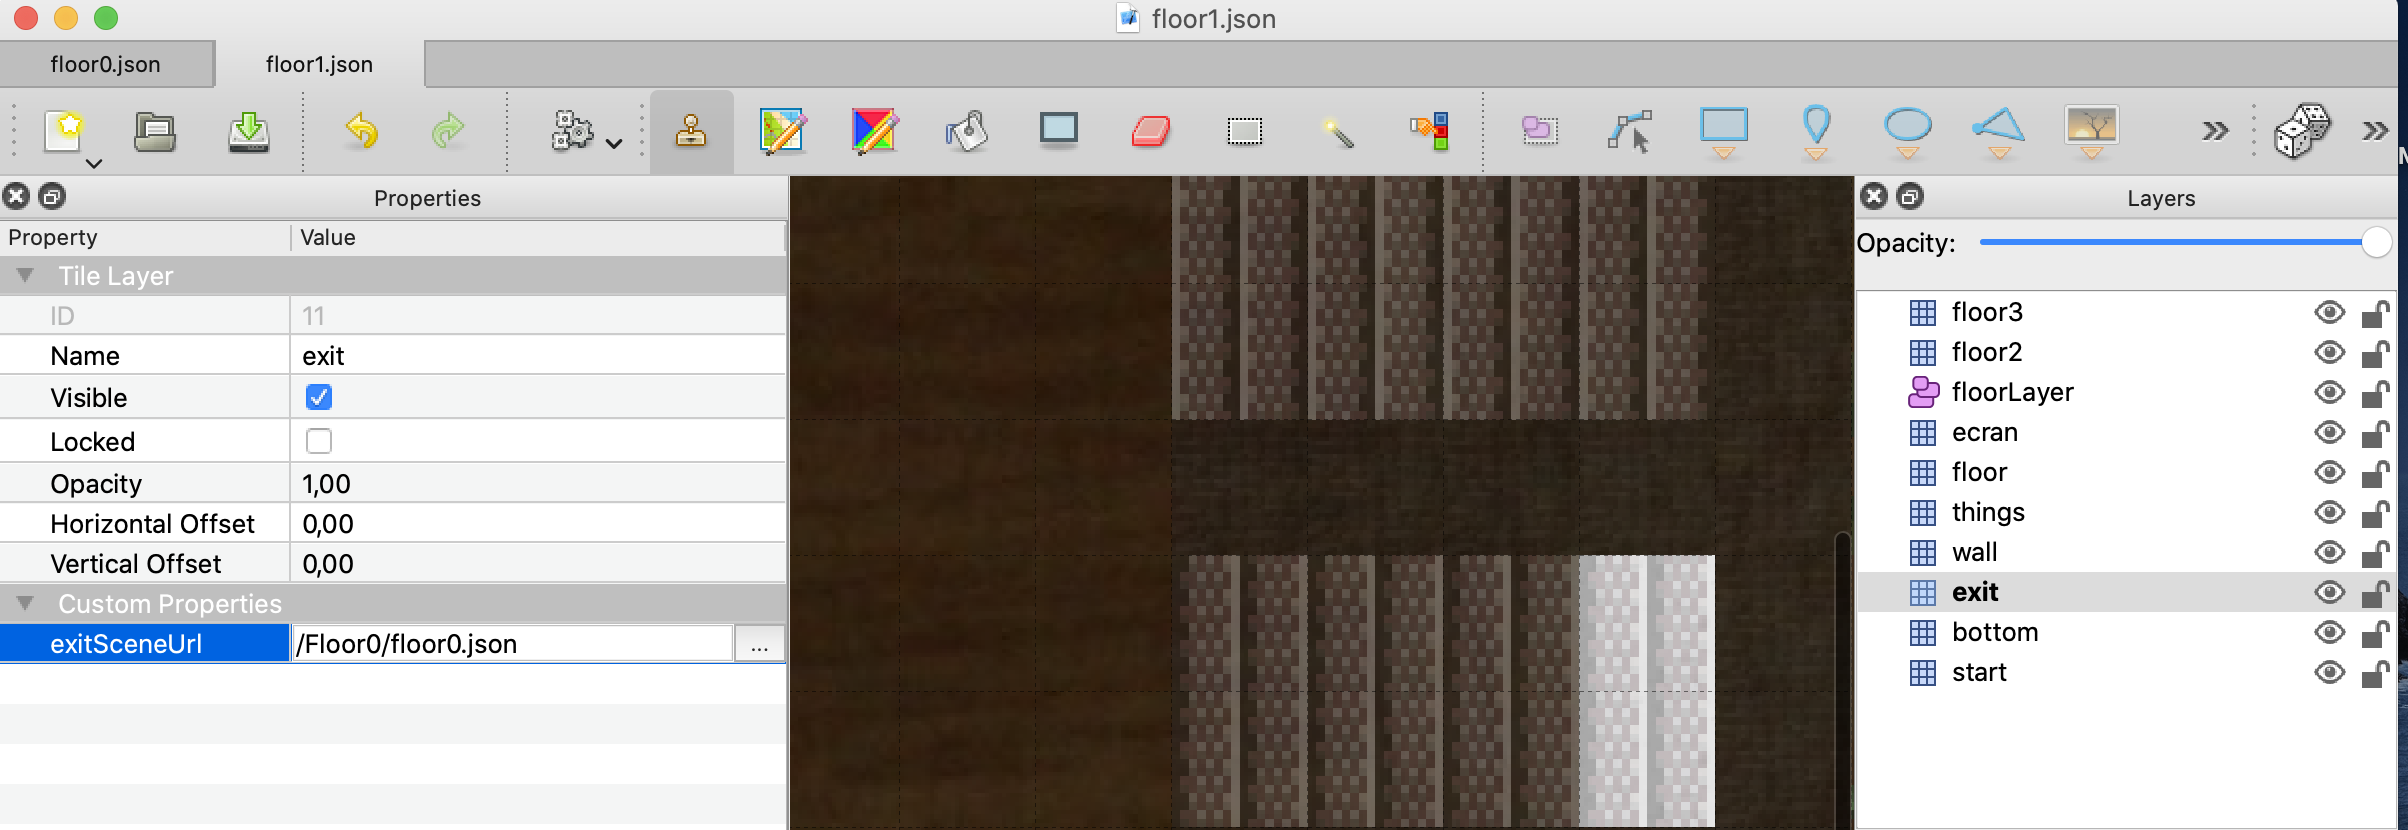
Note: in older releases of WorkAdventure, you could link to a map file directly using properties "exitSceneUrl" and "exitInstance". Those properties are now deprecated. Use "exitUrl" instead.
Defining several entry points
Often your map will have several exits, and therefore, several entry points. For instance, if there is an exit by a door that leads to the garden map, when you come back from the garden you expect to come back by the same door. Therefore, a map can have several entry points. Those entry points are "named" (they have a name).
In order to create a named entry point:
- You must create a specific layer. When a character enters the map by this entry point, it will enter the map randomly on ANY tile of that layer.
- In layer properties, you MUST add a boolean "startLayer" property. It should be set to true.
- The name of the entry point is the name of the layer
- To enter via this entry point, simply add a hash with the entry point name to the URL ("#[startLayerName]"). For instance: "https://workadventu.re/_/global/mymap.com/path/map.json#my-entry-point".
- You can of course use the "#" notation in an exit scene URL (so an exit scene URL will point to a given entry scene URL)
Opening a website when walking on the map
On your map, you can define special zones. When a player will pass over these zones, a website will open (as an iframe on the right side of the screen)
In order to create a zone that opens websites:
- You must create a specific layer.
- In layer properties, you MUST add a "openWebsite" property (of type "string"). The value of the property is the URL of the website to open (the URL must start with "https://")
Opening a Jitsi meet when walking on the map
On your map, you can define special zones (meeting rooms) that will trigger the opening of a Jitsi meet. When a player will pass over these zones, a Jitsi meet will open (as an iframe on the right side of the screen)
In order to create Jitsi meet zones:
- You must create a specific layer.
- In layer properties, you MUST add a "jitsiRoom" property (of type "string"). The value of the property is the name of the room in Jitsi. Note: the name of the room will be prepended with the name of the instance of the map (so that different instances of the map have different rooms)
Making a "silent" zone
On your map, you can define special silent zones where nobody is allowed to talk. In these zones, users will not speak to each others, even if they are next to each others.
In order to create a silent zone:
- You must create a specific layer.
- In layer properties, you MUST add a boolean "silent" property. If the silent property is checked, the users are entering the silent zone when they walk on any tile of the layer.
Pushing the map
When your changes are ready, you need to "commit" and "push" (i.e. "upload") the changes back to GitHub. Just wait a few minutes, and your map will be propagated automatically to the GitHub pages web-server.
Need some help?
WorkAdventure is a young project and much needs to be said / written regarding map editing.
If you are facing any troubles, do not hesitate to open an "issue" in the GitHub WorkAdventure account.